Workflow Creation
An easy way to create workflows for the simpleWorkflow extension
Gii command + yEd Graph Editor
Creating a workflow 'by hand' can become an error-prone task when
several nodes and edges are required. One good option is to create
the workflow using a visual tools, and after some searches it seems
that one of the best (and free) application to do it is yEd Graph Editor.
Once created and saved
format, the workflow can be converted into a simpleWorkflow,
ready to be used by the extension.
In this video you'll see how easy it is to :
- create a workflow with yEd, based on the simpleWorkflow template provided by the extension
- save the workflow as a
graphmlfile - use the Gii command to convert the
graphmlfile into a php file that contains your worklow ready to be used by simpleWorkflow
1. Installation
To be able to create your workflow using yEd Graph Editor you must :
- Make sure you have downloaded an correctly installed simpleWorkflow
- Download and install the latest version of the yEd Graph Editor
- Install the simpleWorkflow Gii Command. Just copy the
simpleWorkflow/command/giifolder to yourprotectedfolder - Make sure that the Gii module is enabled in your
protected/config/main.phpfile
2. Creating a workflow with yEd
To create our workflow with yEd we use the workflow template provided with the extension. This is because This is because our yEd workflow needs to define some custom attributes that will be handled by the simpleWorkflow extension (e.g contraints, tasks, metadata, etc.).
- launch yEd Graph Editor
- open the workflow template file /sW-yEd-template.graphml located in
extension/simpleWorkflow/command - to preserve this template, imediatly save as ... your workflow under a new name.
- start creating your workflow
Using yEd and the workflow template, you are able to set properties which are needed by the simpleWorkflow extension.
There are properties for the workflow itself, for nodes and also for edges (transitions). To access the property dialog box you must first select
the object, and then from the contextual menu, choose the Properties... menu item.
Below is the list of all simpleWorkflow properties available in yEd :
| property name | object | location | description |
|---|---|---|---|
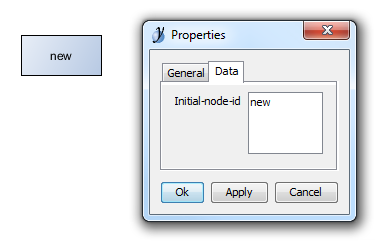
initial-node-id |
workflow | properties/data/Initial-node-id | Id of the node that is used to enter into this workflow. mandatory property |
node-id |
node | properties/general/Text | Id of the node. mandatory property |
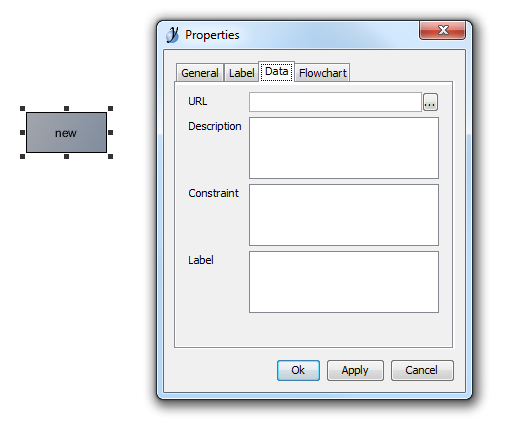
constraint |
node | properties/data/constraint | PHP expression evaluated as a node entry condition |
label |
node | properties/data/label | Status display name |
background-color |
node | General/Fill Color | stored as node metadata, this value can be used to render the background color of a node (if needed) |
text-color |
node | Label/Color | stored as node metadata, this value can be used to render the text color of a node (if needed) |
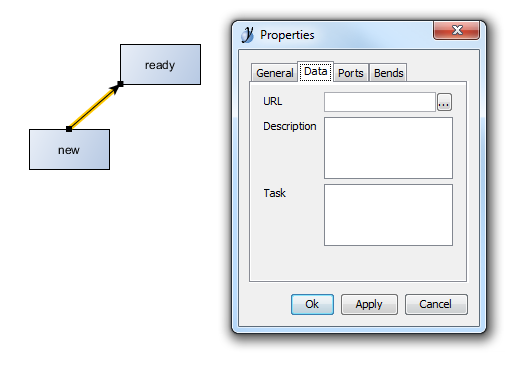
task |
edge | properties/data/Task | PHP expression evaluated when the transition is done |
When you're done, save your workflow into a graphml formated file
warning It is important to select the correct file format when saving your workflow, otherwise the conversion to simpleWorkflow format will fail.
3. Conversion with Gii
Now that your yEd workflow is saved into a graphml file, we must convert it into a simpleWorkflow format.
To do so, select simpleWorkflow Generator from the main Gii page, and upload your workflow.
The last part is to complete de form and choose a code template.
Code templates
Two code templates are available :
- default : the workflow will be saved as an associative array
- class : the workflow is saved as a PHP class that include the definition itself. Using a class to hold a workflow
definition requires a dedicated worklow source component with its
definitionTypeproperty initialised to class. Check SWPhpWorkflowSource API for more on that.
